0

Craft space

Some friends of ours are going to be working on setting up a new craft room soon, and they were seeking input from their other crafty friends about what makes a good craft room.  I realized that I hadn’t shared much about my craft space on my blog, and that I should share before it gets transformed.  I’m planning to swap my craft space for my current nursery room, because I think my active toddler is soon going to need more space, and I need to resign myself to the fact that I am not doing enough crafting these days to justify having my own room in our little house.  The move is my idea, so don’t feel sorry for me, I’m pushing myself into it.

And I’m still planning to have craft space, it’s just going to get stuffed into the current ‘nursery’ room, which is about the size of a walk-in closet.  And I’m going to make sure part of it is dedicated office space so my husband has a quiet place to study (some how I had a “my” space in our home, but he never had a “his” space).  But if we do some finishing work to the adjoining walk-up attic, I might have even more storage space to fit all my craft supplies than I do now, even if they will be a bit less accessible.

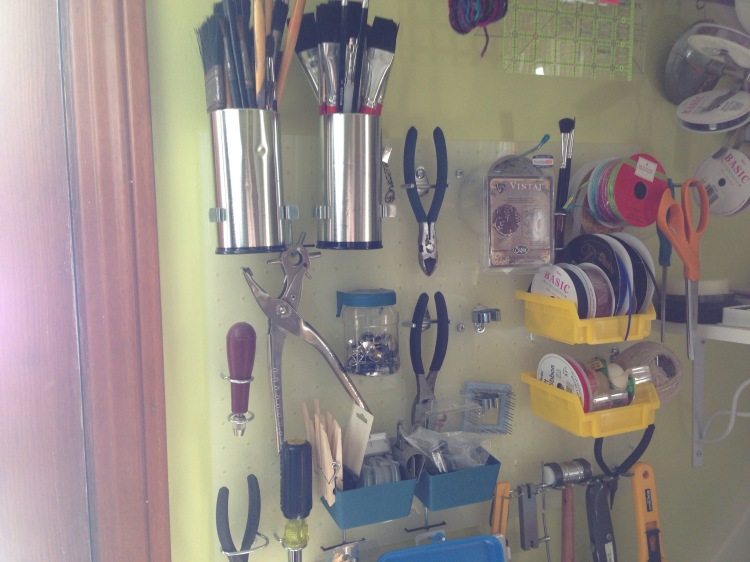
Here are some of my beloved peg-boards.  I just love having so many tools and material accessible and inspiring.

pegboard and paintbrushes and other tools

Small pegboard near adjustable architect’s drawing table.

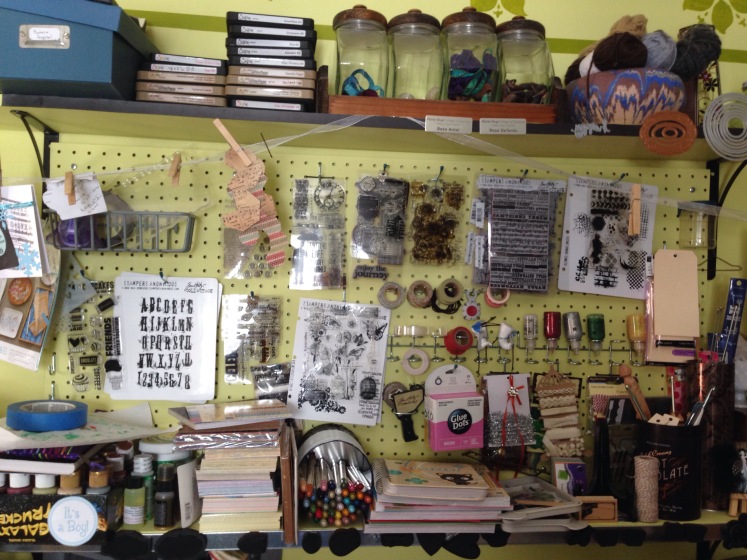
I am torn right now between moving the pegboards, or just re-purposing them for some kind of kid-friendly use and installing new pegboards in the new space.  I think I may have done some gluing when I installed them, never imagining a need to remove them unless we moved out.  See the magnetic (top) and metal (bottom) strips on each shelf?  I came up with that clever idea to display/store my steel rule and Movers & Shapers dies.

pegboard and stamping supplies

Large pegboard with upper and lower shelf sit above long narrow work table.

So, my friend prompted ‘what is important to me in a craft space?’  My answer:

I actually have to start thinking about clearing out and moving my own craft space, as I’m determined to give over that large room to our baby, his toys, and any possible future siblings.  I think we’ll turn the small room+attic into an office/craft space.  It will be good for my husband too, if he starts the PhD program, to have an office space where he can lock himself away when he needs to write.
1.  a) storage (both accessible and long-term), b) work surfaces, c) place for machines or tools that should always be handy for quick work (e.g. sewing machine or grab-and-go types of projects), floor space for spreading out the big projects like quilts or drying sweaters
2.  most of my projects in-progress I throw into clear plastic bags, zippered bags that bedding is sold in or ziplocs.  Non-textile projects get stored in shallow drawers or large paper portfolios
3.  I don’t have a good system for dealing with projects in process, and assimilating new acquisitions quickly.  With very little time to walk into my craft room at all, I find that new things or stray non-current projects or tools from projects I just finished get dumped on my work surfaces just inside the door, and then when I need to whip something up really fast I have no where to do it.  I don’t have a great solution for this, but one half-solution is that I have started having some “random stuff” containers on high shelves, so at least some things can go there out of the way.  But I wish I had a real “stuff to sort” bin right inside my craft-room door.
4.  I have cycled some materials into boxes and into the attic.  There are simply some crafts I don’t need on-hand constantly anymore – e.g. I don’t make wreaths very often, so I don’t need all the florals in my craft room.  I think in my new configuration I will have more easily-accessible space devoted to random catch-all, and shift more stuff like fabric into the attic since I don’t need to access it all the time.
5.  If space were no object I would have picked up some flat map-drawers that were at an architect office sale years ago to store my large paper art (drawings and prints).  We could have got them for a song, but at the time we were in a 1 bedroom apartment.  Right now I don’t have a good place to store fancy scrapbook papers either, so I would get something to solve that problem.  So if time and money were no object, I would get a bunch of cool very craft-specific storage items:  A sewing station, some cool IKEA-compatible scrapbooking storage for stamp pads and paper, more sturdy clear stacking bins for all the miscellaneous fabric and stuff (Staples has a “Really Useful” line that I find very sturdy).
But really, most of my problem these days is time, and keeping dangerous things out of toddler reach.
So my current priorities:
a) fixing the door so it can actually stay shut
b) moving dangerous things to upper shelves
c) add a “stuff to sort” bin or two
6.  I think the things that have worked phenomenally well for me are the following:
a)  pegboard – so much you can do with pegboard, I want more of it, so great for all the crafty little knicknacks and tools, add cups, hooks, clips, it’s wonderful!
b) Having work surfaces far enough apart to run a ball-winder and swift (for knitting).  Ask [friend’s spouse] to measure and make sure she can do it in the configuration.
c) Narrow shelves with cups and boxes for different kinds of tools and supplies
Not sure why the one review is so lousy, I found these to be incredibly hefty for sweater-organizers, I have two in my closet and they keep the dust and bugs away from my precious yarns, yet I still have a nice view of them.  And it makes good use of a closet in a craft room.
e) foam interlocking floor tiles (maybe you already have these?)  Great for blocking sweaters and all kinds of other uses, plus you can pin right into them.  Although your cats will probably scratch them up as they have done to mine, but it doesn’t really inhibit their function too much.
Two things you should consider with the wall space:
1) leave enough room somewhere so that when [friend] creates her spinning wheel, you can rig a clever wall-hanger to put the spinning wheel out of kitty reach.
2) somewhere for a design board or pin-board?  A lot of crafters like to have somewhere to pin inspiring things, or if quilting, a flannel design board to put fabrics and squares together and then step back.  I have a little pin board, but I wish it were in a different spot, and might convert to a flannel board when I move everything.
If you are thinking about craft-room design or organizing, I highly recommend finding issues of Studios by Cloth+Paper+Scissors at the library for inspiration.  It focuses on studios of mixed media artists, so it’s pretty inspiring for people like me who like a lot of different categories of craft.  Of course, some of the fine folks whose studios are featured have their own business space, or a large house, or an out-building in which to come up with the perfect studio.  But some of the storage solutions are inspiring even in small houses such as ours.
Finally, some quick updates on recent knitting projects.
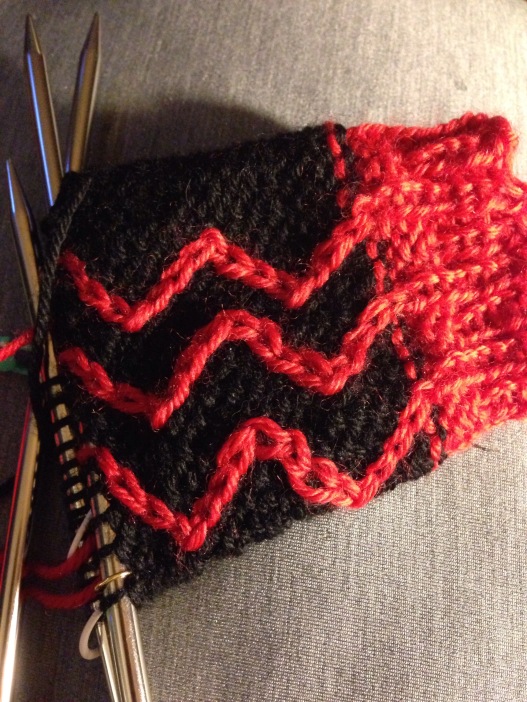
wrist warmers in progress

Sunstreak Wristwarmers from Knitted Mitts and Mittens

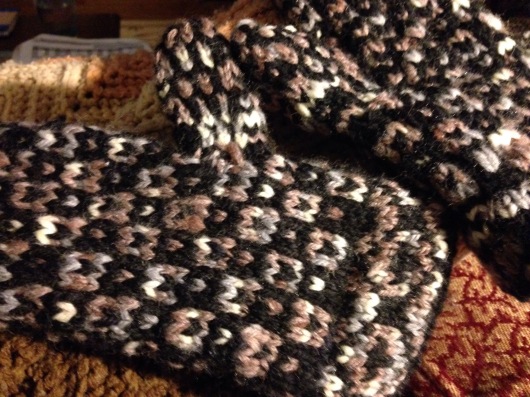
fair isle mittens

Evergreen Lake Mittens from Stranded Knitting Craftsy Class

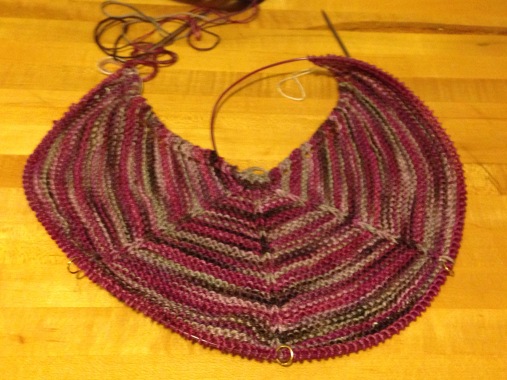
Shawl in progress

Downton Abbey Mystery Knit Along Shawl from Jimmy Beans Wool

0

Funny sort-of Valentine – Tim Holtz February Tag

When I was in college, my friends and I were part of the medieval club. And in someone’s strange humor, Valentine’s day was dubbed “Gargoyle Day”. As I recall it, regardless of dating status we celebrated with break-up comedy movies, chocolate, and gargoyle crafts. There was also a “Black & White Ball” around mid-February as an official club activity which involved modern formal apparel and medieval-style group dances. Yeah, I’m a big nerd, I own this.

Gargoyle Day and the Black & White Ball were my favorite versions of Valentine’s Day. I didn’t mind the kiddie version of passing Valentine’s to every fellow student and making our own mailboxes. And I remember my parents giving me candy and toys. But I guess I don’t remember seeing big romantic displays of chocolates and roses. If my parents did a romantic dinner or something, either I didn’t know, or it didn’t make an impression on me. I do remember them showing each other love and kindness all along the way, and making time for each other on a regular basis.

So in my own dating life, I’ve voted for regular displays of affection over big romantic gestures. Don’t get me wrong, I like the opportunities for creativity inspired by every holiday. And I’m impressed by the romantic efforts other people go to for their loved ones. And maybe, just maybe I’m looking forward to making pink heart-shaped pancakes and other silly gestures for my little boy in a few years. But otherwise, Valentine’s Day just isn’t my holiday.

So that’s a long preamble for my take on the February Tim Holtz tag. But I felt the gargoyle required some serious explanation! I loved the look of his background of embossed hearts that call to mind vintage enameled heart jewelry. I loved the little Industrial sticker details. I’m not sold on the popular chalkboard look, yet. Maybe it will grab my imagination at some point, but for now I’m skipping that technique.

So then the other thing this Gargoyle Day tag needed was a gargoyle! I drew a gargoyle as Cupid, colored it with Distress markers, and pinked up the edges of the circle diecut with Distress ink.

20140216-202340.jpg

Ingredients: Watercolor paper, #8 Manila tag, Industrial border stickers, Distress markers, Distress ink pads, Sizzix Movers & Shapers hearts, Distress rock candy glitter, Seasonal chitchat stickers, Sizzix decorative strip ticket die, Grunge board, Stampers Anonymous Odds & Ends stamp, glitter glue, foil tape

Learning: I feel like I barely squeeked by with the hearts. I had cut them last month from foil-covered Grunge board that was left from the previous tag. I had hoped that I could cover them with red glitter glue and have a cool, mirrored, slightly glittery surface, but I had trouble getting good coverage with the glitter glue. So then I tried to cover with Distress glitter and go with the technique in Tim’s tag tutorial, but I should have just pulled off the foil or removed the glitter glue to switch Glossy Accents, because the glitter glue didn’t hold the glitter on very well when I inked it. Glossy Accents seems to be a really strong adhesive. I did like how easily the Distress glitter dyed with the Distress ink – that is a good trick to remember!

Something I tried with much more success was masking off part of a stamp. I don’t know if other people do this, and maybe there is a better way, but this is the method I came up with. I used bits of painter’s tape to mask off a section of the stamp I didn’t want to print, inked the stamp, pulled off the tape and stamped it. This gave me a nice blank space to scrawl “Gargoyle Day” instead of Valentine’s day.
20140216-204906.jpg
My lettering on the ticket is kind of primitive, and I like to think that my gargoyle was taking over Valentine’s day, like maybe Cupid needed a day off or something. I think I could have pushed that idea a little more, but I didn’t have any other ideas.

Loving: I may have said this before, but I really like how the Odds & Ends stamps go with the Ticket Strip die. It’s just really cool to stamp a custom ticket, and I’m getting a lot of mileage from the concept.

I like the background every bit as much as I imagined, and despite the minor glitter losses I like how the Grunge board hearts came out. I like my gargoyle Cupid too, at least conceptually. I still haven’t decided if I like my “cartooning” style. But that is an issue for a different time.

1

Alethiometer – January 2014 Tim Holtz tag

My husband and I recently finished reading the His Dark Materials trilogy. In these fantasy young adult fiction books, a spunky young girl gets into all manner of adventures across many worlds and is helped along by friends and a marvelous “truth-teller” device called an Alethiometer (aka a golden compass, but don’t bother with the movie of that name because they really muffed it).

So when I saw the January 2014 Tim Holtz tag with the “pocket watch” die, my mind traveled to a pocket watch version of the Alethiometer that I made him for the holidays.

20140131-210850.jpg
I dissected a pocket watch and attached a printout that I had carefully sized and sealed to the watch face.

It turned out really well, and still works as a watch, even!

20140131-211313.jpg

But when I made it, I regretted that I didn’t have time to draw the many symbols myself. I just got the imagery from the internet and combined with some pearl inlays I had created previously in photoshop for a different project.

20140131-211651.jpg

So I thought it would be great to use the pocket watch die to make an Alethiometer of a size where I could draw the symbols in for myself. Otherwise, I followed much of Mr. Holtz’ tutorial for the pocket watch and the background.

20140131-212406.jpg

Ingredients: Manila tag size 8, Sizzix Frame Pocket Watch die, Sizzix Alterations Circles, Super fine gold embossing powder, Glossy Accents, Sizzix tickets decorative strip die, Tim Holtz clockwork stencil, Holtz Grunge alpha stamp, Distress inks and markers, Martha Stewart lettering stamps, Stampers Anonymous Odds and Ends, Archival ink, Idea-ology game spinners, Micron pen, Darice embossing folder, Grunge board, Tarnished Brass Distress paint, and some words I printed. Whew!!

Learning: I screwed up the count on this. For some reason I thought there were 32 symbols, but by the time I got to drawing to the last few symbols, I realized that there were supposed to be 36! Oops! At the same time, I don’t think 36 would have worked out proportionally. It was hard enough to draw in those tiny spaces as it was!

My other mistake was that I had the foil side facing up when I went to cut the pocket watch. So I had to flip it and reroll it in order to get that impressed inner rim. This made the whole thing a bit more fragile, so I backed it all with a diecut piece of paper.

Loving: Grunge board was really fun to work with, very pliable, fun to cover in foil and cut! I also loved how nicely the ticket stamp matched the ticket die.

The words on the ticket die were a happy accident. I initially tried to spell out my quote with Martha letter stamps but my experiment didn’t fit well. So then I printed out what I wanted in a small font. I was going to just use a fresh ticket diecut, but then I realized that my printed word strips were so small that they fit between the stamped lines for a cool echoed sentiment. I love the way that worked and will file that idea for use again!

I also like the way the embossed word “Alethiometer” looks. I had to cut apart the Grunge alpha stamp which was tedious but so worth it! To make the gold pop a bit more, I blended more black soot ink over the gold embossing.

1

Stamping snowflakes with flourish

For the Simon Says Stamp Monday challenge this week, the goal was to use flourishes. I wanted to combine flourishes with snowflakes for a snowy, wintery scene. But I had some trouble getting the stamp impression to look the way I wanted.

At first I thought it was something about Distress inks, because they were beading up on the stamp surface. Then I tried it with some craft store brand inks, and they reacted similarly. Then I washed the cling stamps very well with soap and water. That seemed to help the most.

20131208-215358.jpg

I need to learn more about using these cling stamps. Are they prone to beading? Are certain inks more susceptible? Is it just because I had the stamps sitting in their package for a really long time before using them?

In any case, I was eventually satisfied with the impression. Then I embossed it, and added some die cut details.

20131208-215622.jpg

Ingredients: Snowflake stamps by Inkadinkado, flourish stamp by Scrappy Cat, flourish Movers and shapers die by Sizzix, Perfectly Pierced oval by Flourishes, Ranger super fine embossing powder

Learning: Obviously, I need to research better stamping technique, but I feel like I made some progress. I also feel like I’m making progress in coming up with my own layouts, although I still think this one could have used a little ribbon or something. I also think I would have preferred the more muted tones of the Distress inks for this project. The punchier blues make it seem a little hectic to my eye.

Loving: I was really happy with how the die cuts added to this one. I was also pleased with my combination of snowflake and flourish dies – it’s a lot of fun to compose a bunch of cling stamps on a big acrylic block!