0

Fluffy stuff

To add a little levity to our Northcoast Knitting Guild Newsletter, I decided to try cartooning.  Maybe I’ll make it a series, we’ll see!

This cartoon originally appeared in the Northcoast Knitting Guild Newsletter, November-December 2019 edition.  If you are in the Cleveland/Northeast Ohio area, our guild has educational and fun meetings every month, and many friendly knit-ins besides.  Check out our website for more information!  Northcoast Knitting Guild

a cartoon of sheep

Pumpkin Carving with Fluffy & Beau – by Bess Antol 10/2019

0

Egg dyed yarn

I was texting with Mom about Easter plans and about dyeing eggs with my kiddo and she said “With the left over dye you could dye a yarn blank.” Well that makes sense, I thought. I have dyed yarn with cake icing color and Kool aid, why not try egg dye?

Inspired by this video by ChemKnits, I felt like a cake dye would be most fun.

The yarn:

KnitPicks Bare – Sport Weight – 75% superwash Merino wool, 25% Nylon

274 yards/100 grams each

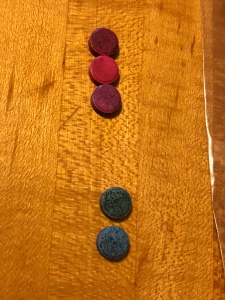
The dyes: PAAS egg dye tablets

The process:

First, egg dyeing. Can’t steal focus from kiddo’s fun.

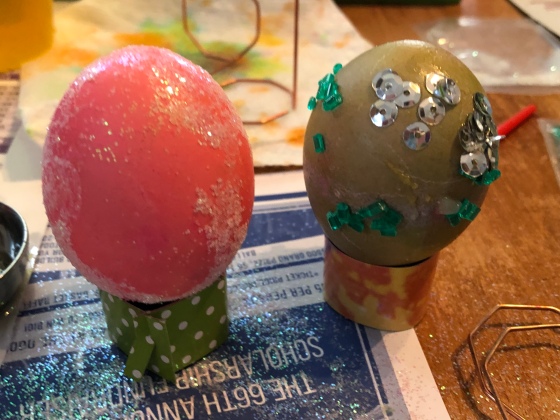
Then, Presoak 30 minutes: 1.25 gallons water, 1.4 cups white vinegar, two 100 gram skeins

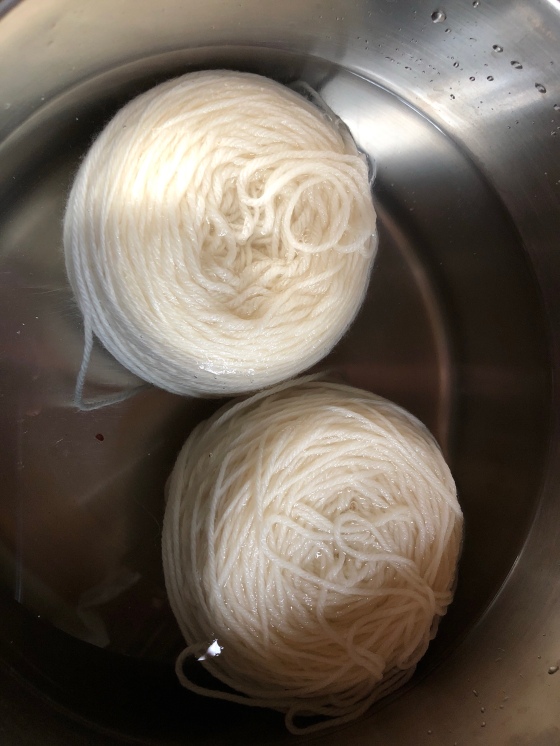
I had bought two egg kits at the store for different techniques and accessories. But we didn’t need the duplicate tablets.

I also saved some of the leftover egg dye. I figure, it’s pre-dissolved, but it’s just vinegar, water and dye.

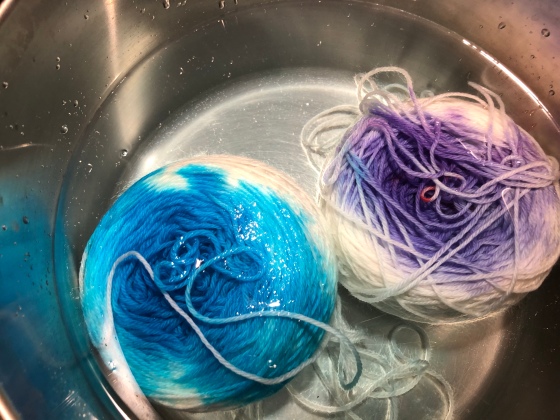
Following ChemKnits’ idea, I jammed one and a half tablets into each cake of yarn. For the record, I think it’s 1 pellet of strawberry red plus half a pellet of pink in one, and 1 purple and half a pink in the other.

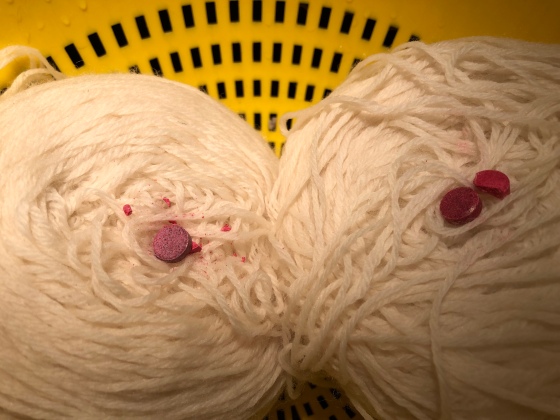
I jammed them in the middle, covering the gap with yarn. There’s a reason I picked reddish hues for the middle. I read somewhere that red dye would pick up faster into the yarn than blue. This might be crucial, because in the middle they will get less exposure to the bath and may dissolve slower. At least, that’s my thinking.

I poured some leftover, pre-dissolved stuff around the middle region of each ball and squeezed to move the dye through. (Purple on the one with the red center, blue on the one with a purple center).

Then I put them in the dye bath, and poured a blue-green leftover around the outside. Then dissolved another blue tablet and another green tablet in about a tablespoon of vinegar each (for the record, I tried just dumping them straight in the vinegar-water bath and they just weren’t dissolving, so I pulled them out and went the pure vinegar route to dissolve the tablets first).

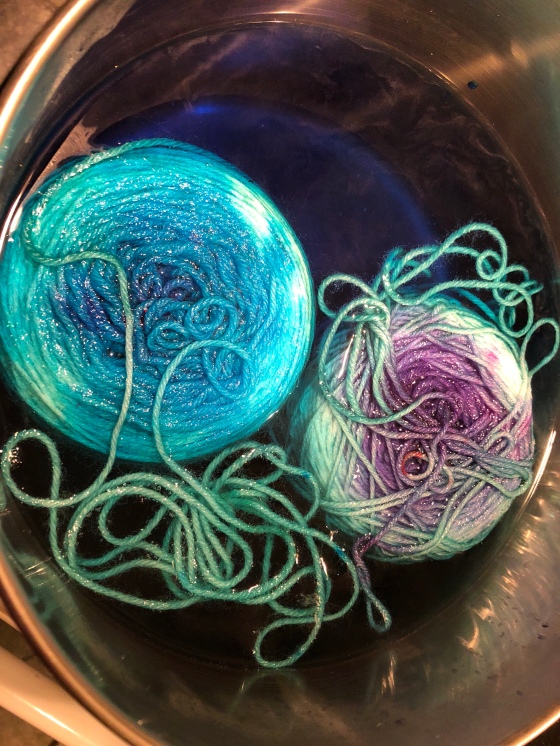
It took forever for the dye bath to look exhausted. After about 30 minutes, I remembered from a previous food color dyeing adventure, that red colors seem to sink, and blue colors rise. The bottom of my cakes were looking pretty bare at that point. So I started flipping them over in the water every ten minutes. That helped even out the blue. But the bottom centers still looked pretty red.

After about 2.5 hours of simmering, it was nearly time for bed, so I drained them. The water in the pot was still looking bluish, but it looked pretty clear when I squeezed the cakes of yarn.

I could tell at this point that there will be bare yarn in parts of it. I suspected that there may only be thin bands of color and everything else will be blank.

Wet yarn cakes

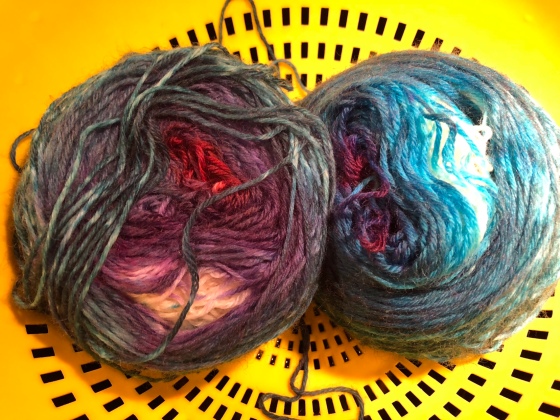
Next I was faced with two soaking wet vinegary yarn-cakes that needed to be rinsed.  So I reskeined them with a niddy-noddy… while wet.  Kind of yucky.  But eventually that unpleasantness was over, I tied off the skeins at intervals and rinsed them carefully but thoroughly with cool water.

Once dried, this was the result.

Yarn speckled blue and purple

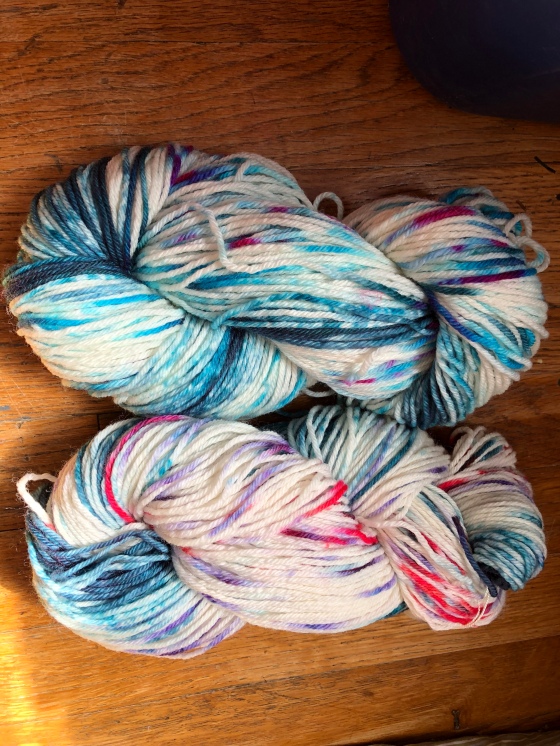
Finished egg-dye-tablet-dyed yarn

I don’t think there are any completely bare sections, everything has at least a tad of dye on it, and it has a somewhat speckled effect which is popular at the moment.  I’m pleased with the saturation of the colors in the sections that did dye, but a bit disappointed that less area was hit by dye than I’d hoped.  Like a long-change or gradient dye technique, there are definite zones to this yarn where the outer edge is one color and then inner edge looks different.  I gifted one skein and I’ll probably use the other one for a shawlette or a cowl.

I guess I’ll put these techniques in the back of my mind.  This would be really cool for an overdye on yarn that already had some color to it.  It was nice to prove to myself that even with my busy life I can squeeze in enough time for a quick and easy dye project now.  Kiddo is getting older and needs less constant attention which is allowing me to get more crafting done.

For my next dyeing adventure, I’m going to a real-live in-person dye class with my Mom in about a month that is specifically about long-change gradient dyeing.

Until next time, keep those dye-pots bubbling!

1

Drumcarding for color

image

At the rate I’ve been posting, you would think I haven’t been crafting. But no, the sad truth is that I’ve just gotten terrible at taking pictures of what I’ve been doing lately. So as I suddenly remembered to take pics today, here you have a post at last. I restarted my frogged top-down lace cardigan, and it’s going much more symmetrically this time around. I spun some funky art-yarn (not pictured, sorry) with my lovely lincoln longwool locks and some sari silk fibers, and then made two wall hangings (also not pictured, again sorry). What reminded me that I’m a craft blogger and I’m supposed to keep to a regimen of taking photos of my processes and projects, is the absolutely stunning colors that came out of my drum carder last night and today… But I also didn’t take pictures of the drum carder, the carding, or the batts… Again, sorry. The good news is that as I was oooing and ahhing over my beautifully saturate and multi-hued singles, my husband said ‘hey, you should take a picture of that’. Suddenly I remembered that I should have taken some pics earlier in the process. Blogging is hard (no, not really, I just forget sometimes).

image

So here are the three beautiful rovings (when I finally remembered to take a pic I had terrible lighting and a short leash on my uncharged photo device). If the colors are hard to discern, they are blue/light-blue, muted blue/light pink, and blue/purple/bright pink. The fibers in them are largely assorted alpaca that I had dyed blue/purple/green/red with my friend Emily earlier this summer. A dash of mohair and linoln longwool from the same dyebath, some KnitPicks roving for stability and color depth, and a tiny bit of angelina sparkle. Using the awesome Deb Menz Color in Spinning book as a guide, I carded two of the rovings for a subtle blend, and one of them for a blend that should have some long but subtle color variation.

image

Alright, lousy pics are almost worse than no pics at all. Anyway, I started spinning up the singles from one of the rovings and I am really excited about the color. I’m going to try 3-plying a bit of it for a hat, and then the rest might be left as singles for a bolero ala the Craftsy lace cardigan style. Next time I’ll do better about the pics. Until next time, keep those needles clicking…

1

Fiber fair and fairly awesome fiber

I had been eagerly anticipating an opportunity to attend the Great Lakes Fiber Show with my parents for at least a month.  They had given me a refurbished drum carder as a graduation gift and I wanted to reignite my deep fibernerditude with fiber-fanatic atmosphere.  I also needed to diversify my fiber stash to take advantage of my new drum carder.  To get “my hand back in” to the spinning world, I’ve been dropspindling some silk hankies (mawatas) that I had purchased a while back.

dropspindle silk

Dropspindling from silk mawatas

Continue reading

0

Dye teasing

I just graduated today, and suddenly I can look forward to all manner of free time.  I’m delighted to be done, and very proud to have a Master’s degree… But I’m also eager to turn my focus to home, arts, and family. 

Our favorite annual gaming convention – and my costuming deadline – is just a few weeks off, so no time for a long post.  Here’s a brief tease of vat-dyeing adventure results:

image

Seafoam green, plum blossom, and safari grey

The seafoam green came out nearly white (there’s an undyed hankie in there to show the similarity), the plum blossom came out crazy hot-pink on ths skirts (though more dusty rose on some canvas aprons not pictured), and the safari grey came out much warmer and more brownish than expected.  That’s the adventure part of dyeing!  You never know what will happen.  But these base colors are only the beginning.  There will be tie-dyeing, shibori, painting, resists, and more in the future for these garments. 

image

And here’s an update on the jacket and harness rig that are a staple of my costume.  I’ve been refining both, improving them from what I wore last year.  Adding detail is especially important in steampunk looks.  Adding accessories to the belt/harness have pushed the inspiration into a “faerie hunter” theme, I like that it can be adventurous but not so rugged that frills and lace would be out of the question.  Not sure what might be done before the costume deadline, especially since my sewing/embroidery machine has had a breakdown and needs to go in for a repair and tune-up.

Until next time, keep those dye-baths bubbling and needles a-stitchin’…

0

Preparing for a new (dye) adventure

School is nearly done.  Not just for the semester but indefinitely.  I am about to graduate and all I can think about is a summer of gardening, crafting and playing board games.  First up is a grand adventure to a gaming convention in my state.  Lots of people dress up in costumes, like any big geeky con, and this year’s theme is “Timetravel”.  It suits me well, because I really love steampunk and I think it will fit.

For last year’s early summer gaming convention, I started trying to cobble together a steampunk look,

Continue reading

4

Breaking the Black Dye

The steampunk swap wrapped up last week, the box of goodies is even now wending it’s way through time and space to it’s recipient.  So this is a back-dated adventure from when I was in the thick of it.

Still hard at work on the steampunk swap, I had an inkling that my spoilee might appreciate yarn in a  colorway that resembled crow or raven feathers.  Blue Moon Fiber Arts has some amazing “Raven Clan” colorways that were the catalyst for this idea.  They are beautiful blacks with dashes of color, almost iridescent.  But alas, I’m on a credit-card diet for a while, so I could not indulge my spoilee’s and my desires for this particular yarn.  It’s not that it’s over-priced or anything, it’s just that I knew I would not be able to stop myself from buying several beautiful colorways, and that it would quickly get out of hand.  Sometimes it’s best for me just to not buy anything, rather than let myself get tempted to add just one more thing, and another, and another.

But I felt that I might be able to achieve something inspired by the crow feathers and the Raven Clan yarns with a funky dye technique using Wilton’s cake frosting tints and roving that I have at home.  I had wanted to do this technique for a long time, and my spoilee was giving me just the excuse I needed.

Wilton’s icing colors, like KoolAid, can be used like real yarn dyes to permanently (usually) color mammal-fiber yarns (ie. wool, alpaca).

Dye Day Adventures in KoolAid

Continue reading